Lesson #9 - How to Repair Damaged Film
Table of Contents
Installation training video – How to fix damaged film
Renovation rarely goes smoothly, and during the installation of interior film, various mishaps can occur. Your material may get dented, or air bubbles may appear in the middle of the surface. Additionally, the film can be damaged later on, whether due to a dog bite or an industrial scratch. Replacing the entire surface can be costly, but fortunately, all of these issues are fixable.
Let’s explore how to repair damaged film by following our guidelines or watching the accompanying video.
Tools for repairing interior film
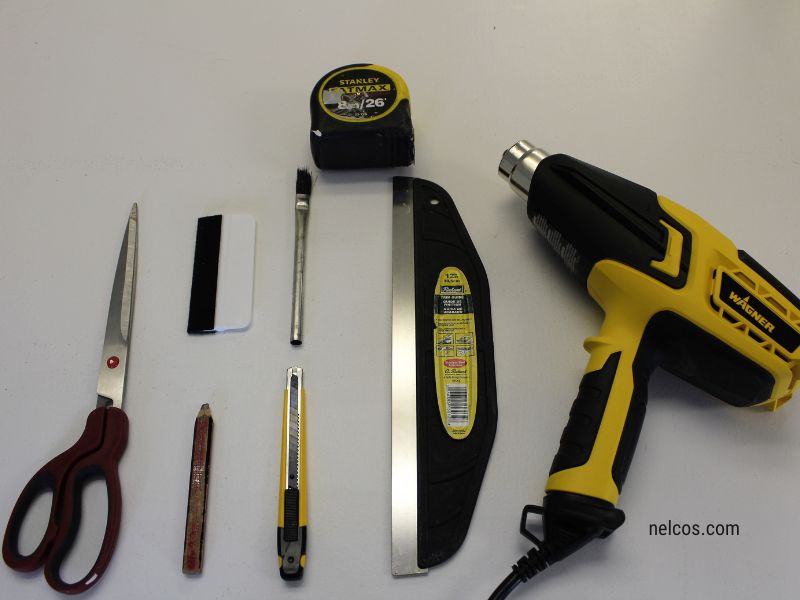
We’ve discussed an entire toolkit for installation in the previous lesson. For the repairing process, you will need a few specific tools:
Knife
A sharp and precise knife is indispensable for cutting the film smoothly. It’s crucial to use brand-new blades to ensure clean and accurate cuts. A sharp knife will enable you to trim the damaged portions of the film with ease and precision.
Air-release pen
An air-release pen is a specialized tool designed for puncturing tiny holes in the film. These pens have sharp, fine tips that create barely noticeable holes, which are essential for releasing trapped air bubbles. It’s important to note that the air-release pen should be used exclusively for its intended purpose of poking holes in the film, and not for any other tasks.
Squeegee
A squeegee is a versatile tool that serves multiple purposes in film repair. It features a flat, smooth rubber blade attached to a handle. The squeegee is primarily used for cleaning surfaces and removing air bubbles. When dealing with air bubbles, you can use the squeegee to smooth out the film and push the trapped air towards the edges, gradually eliminating the bubble. Additionally, the squeegee can be used to control the flow of liquid on a flat surface, which is useful during the installation and repair processes.
Heat gun
A heat gun is a tool that emits a stream of hot air, typically at adjustable temperatures. While it’s more commonly found in the arsenal of professional installers, having a heat gun can be incredibly helpful when repairing damaged film. The application of heat softens the film, making it more pliable and easier to manipulate. This is particularly advantageous when removing dents from the film. The heat gun allows you to warm up the affected area, making it more receptive to reshaping and restoring its original appearance. However, it’s worth noting that if you don’t have access to a heat gun, a squeegee can be used as an alternative tool, although it may not be as effective as the heat gun in certain scenarios.
Each of these tools plays a crucial role in the film repair process. The knife ensures precise cutting, the air-release pen helps release air bubbles, the squeegee aids in smoothing and controlling the film, and the heat gun (or squeegee as an alternative) assists in removing dents and reshaping the film. With these tools at your disposal, you’ll be better equipped to repair damaged film effectively.
Dealing with air bubbles
Imagine you’re wrapping a surface with film, and suddenly, an annoying air bubble appears.
Squeegee method
The first method is to use the squeegee. When you have only a few square feet of film, smoothing it out towards the edge won’t take much time. Thankfully, interior film is highly stretchable.
Air-release pen method
The second option is to use the air-release pen to poke a tiny hole. The piercing tip is so sharp that the holes won’t be visible to the naked eye. You can check the video to see the process for yourself. But remember, never use the air-release pen for anything other than its intended purpose.
Fixing dented film
Film rolls often get dented, especially during transportation. However, this is perfectly normal. The air channels within the film make it easy to remove dents. While a heat gun would be ideal for this task, we understand that not every DIY enthusiast has one. In such cases, the trusty old squeegee becomes your go-to tool. It becomes more effective when you have something warm (not hot) to apply to the film.

Addressing scratches, visible holes, and more
Now we come to the most challenging part: dealing with scratches, visible holes, and other types of damage.
Step 1. Find the proper film pattern
Step One is to find a piece of film that closely matches your initial pattern. With solid colors or homogeneous metals, this won’t be a problem. However, patterns like wood carvings and circles might pose a challenge.
Step 2. Cover the damaged area
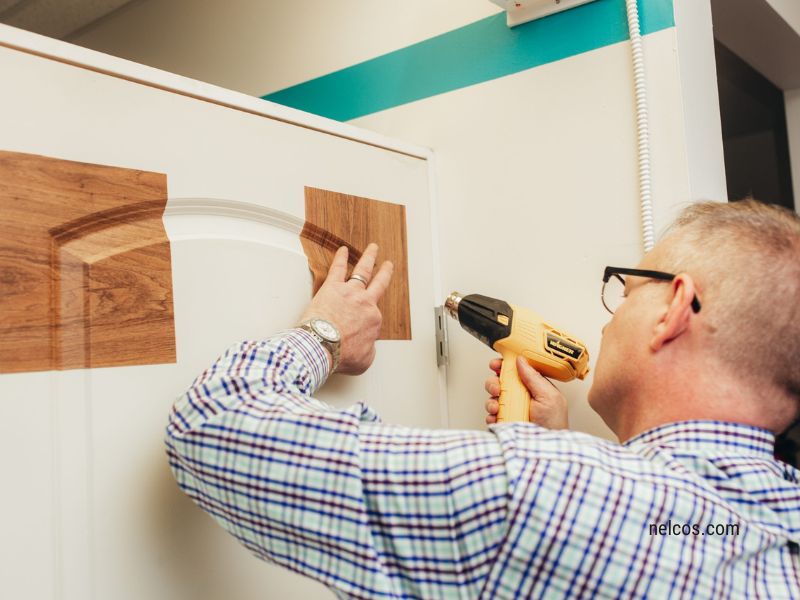
Step Two involves pressing the overlay into the damaged area. A heat gun can be helpful in making the edges more visible.
Step 3. Make the new patch fit
For Step Three, cut off the remaining part of the overlay, leaving about 1/4 or 1/8 inch. To achieve a seamless repair, you’ll need to peel up the overlay on the edges and cut out the original film to perfectly fit the new patch. To grasp this process more effectively, refer to the video (starting from 7:28).
Additional tips and beyond film repair
By the way, at the end of the YouTube video, there’s a bonus tip on how to apply film to corners without affecting the wall paint. This exclusive tip comes from our professional installers with over 20 years of industry experience.
We hope you found this lesson useful.
Stay tuned for our upcoming lesson on how to determine the amount of extra film you’ll need for refinishing.
Previous Lessons
EXPLORE!


