Lesson #5 with Peter Maki

Restaurant Upgrade
Nelcos installers have recently refinished tables at Hanwoori Korean restaurant. If you would like to see more photos about this upgrade, please read our previous blog post – Hanwoori Korean Restaurant Upgrade.
How To Wrap a Table
In this blog we will take a closer look at the techniques of table refinishing. In the video below you will see how our experienced vinyl film installer Peter Maki performs film application on the table surface.
To guide you through this lesson, we made a list of main points in the video:
0:20 – surface preparation | 1:36 – priming | 2:17 – film preparation | 2:38 – start of installation | 4:48 – wrapping edges and corners | 8:00 – double cut | 12:13 – final result
Step-by-Step Table Wrapping

Step 1. Surface Preparation.
So first, we need to get the table prepped so we can prime it and fill in any holes. You want to start with the smoothest surface as possible. Depending on the kind of vinyl texture we’re installing, any imperfections can be seen through. So the smoother the surface is the easier it is to get a nice, clean install. We are starting with a palm sander 1-to-20-grit or with a piece of sandpaper 80-grit. We want to get some of the impurities off.
As soon as we finished sanding the surface is smooth and ready, we can start to prime.
The table had some burn marks so we needed to sand table down to get nice and smooth surface, but there are some impurities, bumps that will show through the vinyl. So what we are using is a wood filler. Smoothly apply it where necessary. It sets quickly so in about 15 minutes we will be ready to sand again and get a nice perfect surface ready for priming.
Step 2. Priming.
Apply a water based Bodaq primer that is 50% water – 50% primer. We want to evenly prime the entire surface. And as we are doing this, we want to be sure that we have as few bubbles and as few large spots of primer as possible because as this dries, it may dry with a bit of impurity, which could be seen through the vinyl. The primer will ensure that the vinyl never comes off unless you choose to have it removed.
Step 3. Prepare Your Vinyl Film.
Start with cutting the strip of the paper backing. We will start with covering the leg of a table. Cut off a couple inches of the top, come across, pill the back. Now you are prepped and ready for an install.
Step 4. Start the installation.
Secure the film at the bottom of a table leg. Then pill off the paper backing and start film application helping with a squeegee.
The next step would be film application on a table top. Line up the piece of film cut to the necessary dimensions. Take a medium squeegee with a felt on it and lock film in place. Roll the rest of a film piece. And because its locked in we know its not moving. Then start to fold the paper back, just slightly off, just enough to start. Flip it over and leave the material. Now you can start to overlap with a lot of pressure on the squeegee strokes. Once you’ve started, start to pull the backing from underneath and continue application with a squeegee.

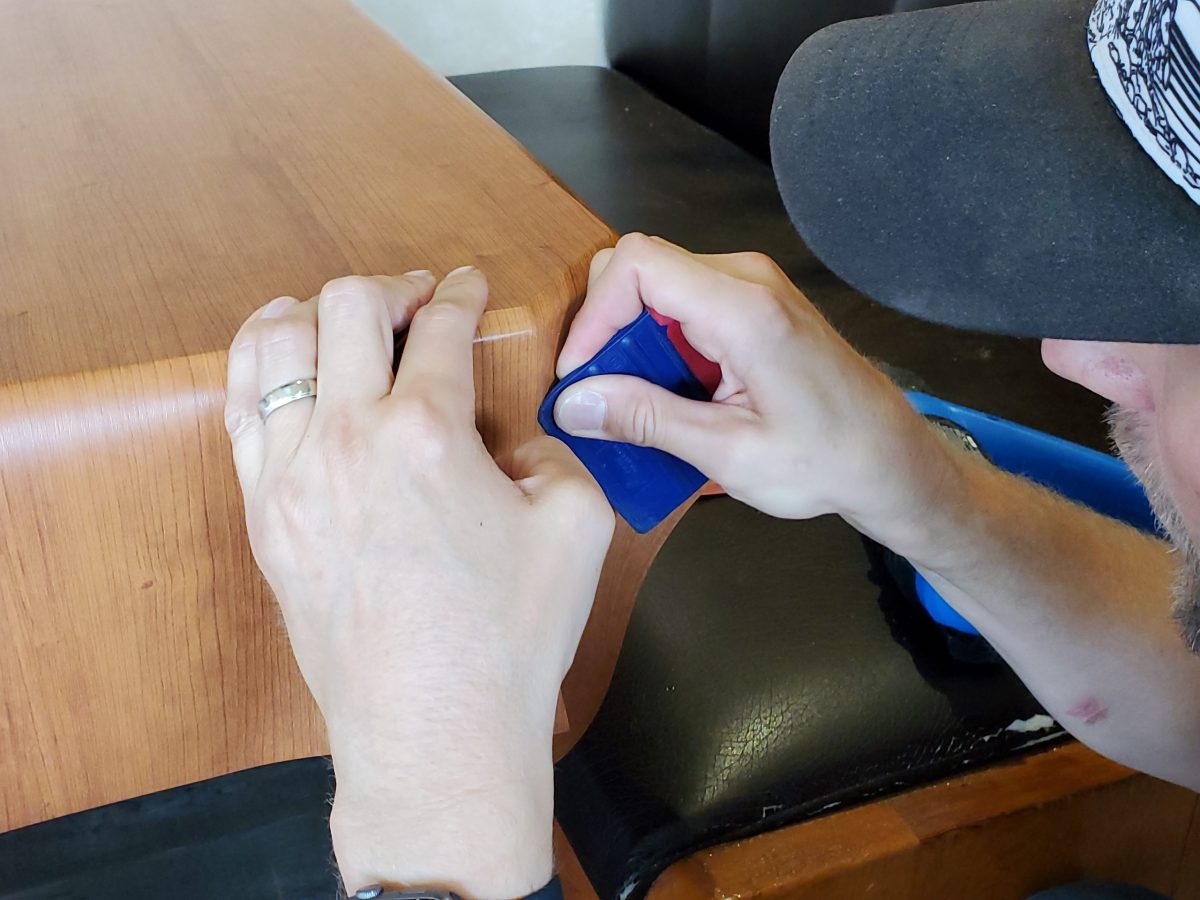
Step 5. How To Wrap A Corner
The table is a little bit different because there is a slight pebble on the edge of the table and a 45-degree corner. So the installation will be done in two steps. First, start heating the material up and then bending it down this 45-degree pebble. And then follow it up with a double-cut.
Step 1. Heating and bending
Heat the material a little bit. You don’t want to overheat it. We need to stretch it down slightly and place it on the edge. Then secure it in place with your thumb. Lock it down so it won’t go anywhere. Now pull it slightly back up, reheat it to return it to its original shape. This will allow us to get nice even cuts without overstretching the material. Bring it back up to the bottom of the pebble. Heat it a little bit more. Once it cools down a little, start pulling and getting the corner wrapped. Lock it in place with a squeegee.
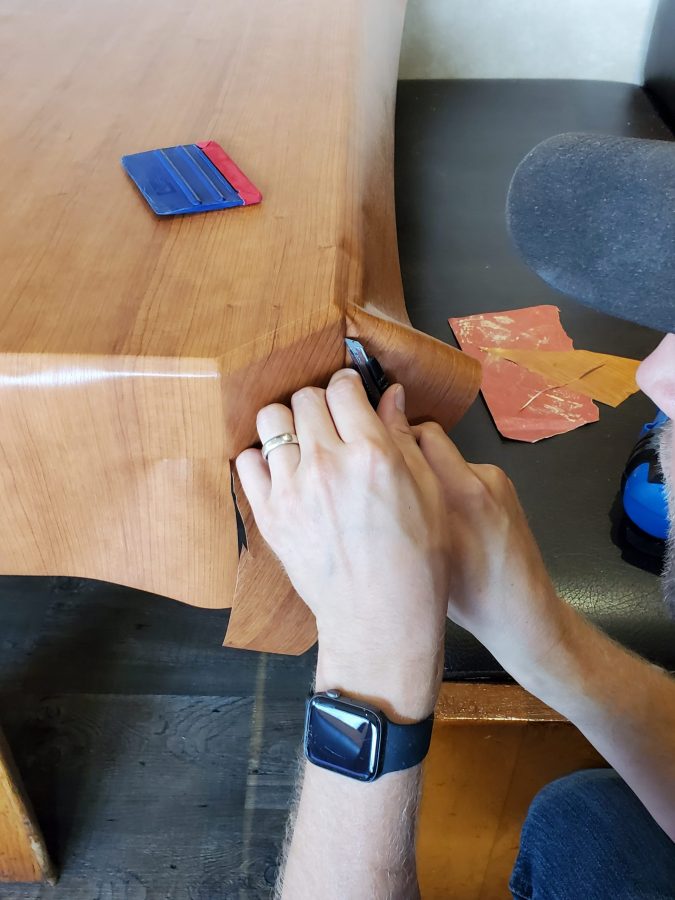
Step 2. Double-cut
To perform a double-cut, you need a fresh blade. Start cutting from the corner down the side. Give it a little touch of heat to get rid of wrinkles. Do not stretch the material here. Secure the film on the side of the corner. Overlap the first cut and cut off the excess of material. Repeat on the other side.
Join the seems of the double cut. With back and forth motion of a squeegee, pull it down to make the seem almost invisible.
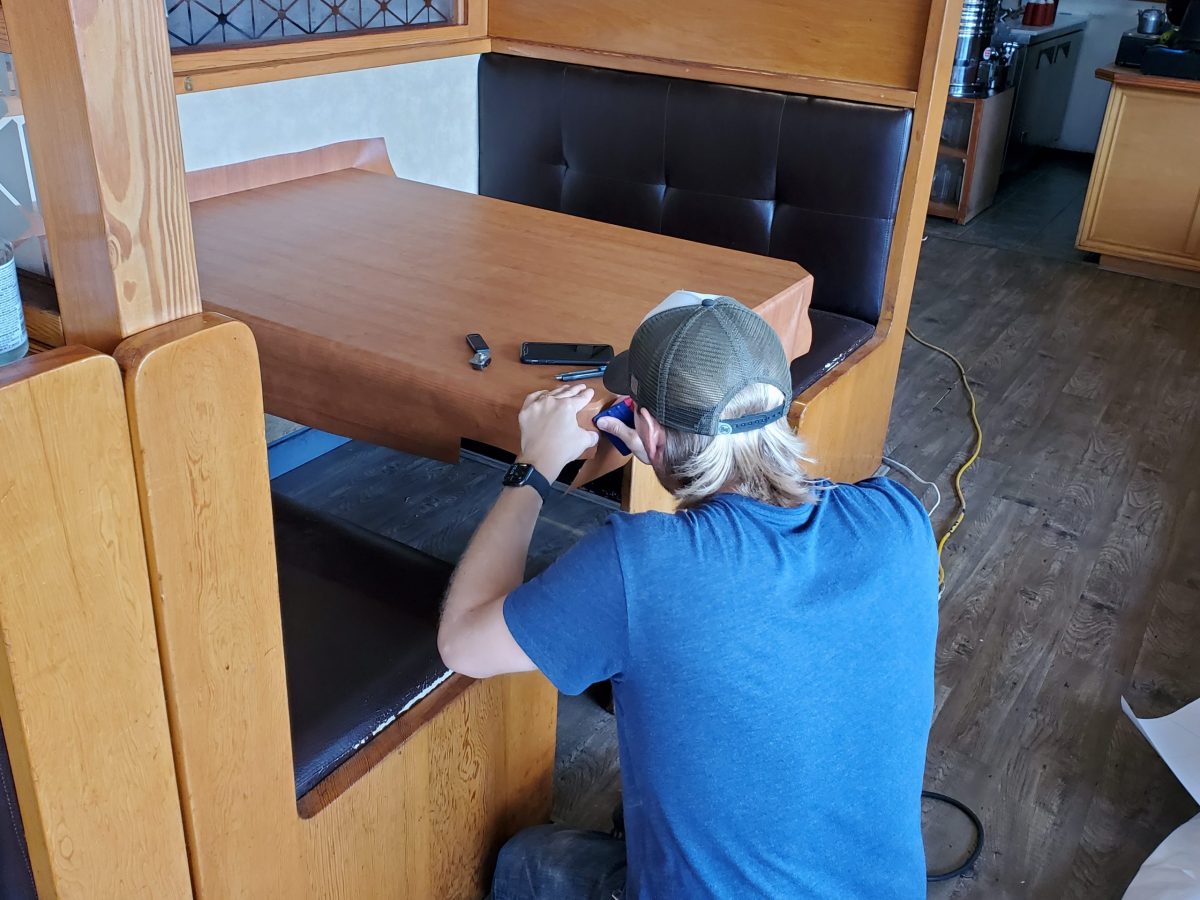
Under this table, we have a flat edge. To get a clean look, we need to wrap a film underneath. Heat the film and slightly pull it underneath. You can feel that surface is flat with your fingers. Then trim along the inside edge with your utility knife. Do the same on each side.
Make sure that everything is nice and smooth under the table, and enjoy the final result.
Contact Us
If you are interested in our product or services, feel free to contact us. We are always happy to assist.
If you would like to learn how to install an architectural film or become a Bodaq certified installer, visit this page – Training to know more about our offers.


