Or How I learned the techniques of Architectural Film installation
Are you curious about learning new skills as I am? Then I offer you to join my learning journey. Today I’ll show you my efforts in the architectural film installation.
For those who hear about this material for the first time, architectural film or interior vinyl film is one of the solutions for interior renovation. It comes in rolls, is stretchable, very durable, and cost-effective. There are also hundreds of various textures and patterns that feel like real wood, metal, stone, marble, leather, and many more. Some use it to cover surfaces, like walls, doors, furniture, etc. in commercial and residential interiors.
To get back to the point, let me introduce my instructor Alan. He guided me through the main steps of the basic install that is easy to perform.
START
To start with, I need a surface to refinish, tools, and the film itself. Today we’ll be renovating a small kitchen cabinet door with the wood film pattern PZ912 Oak. As a side note, the pattern feels like real wood.
MEASURE AND CUT
It is important to take accurate surface and film measurements. The film should be measured with an allowance to give space for wrapping the surface.
So we measured the elements of the door, then cut the film of the necessary measurements. Therefore, we have cut five pieces of film.
PREP
Then the next important step is surface prep. The surface should be smooth. If not, then flatten it with putty followed by light sanding. Then use a degreaser and next – primer. The last solution is optional, however, some surfaces require priming for better adhesion. If there are corners or edges, pay more attention to those parts when applying a primer.
In my case, the cabinet door was already prepared for me.
DRY
After prepping, let the surface dry for 15 minutes. Sometimes this process takes up to an hour. When the surface dries out, the installation can begin.
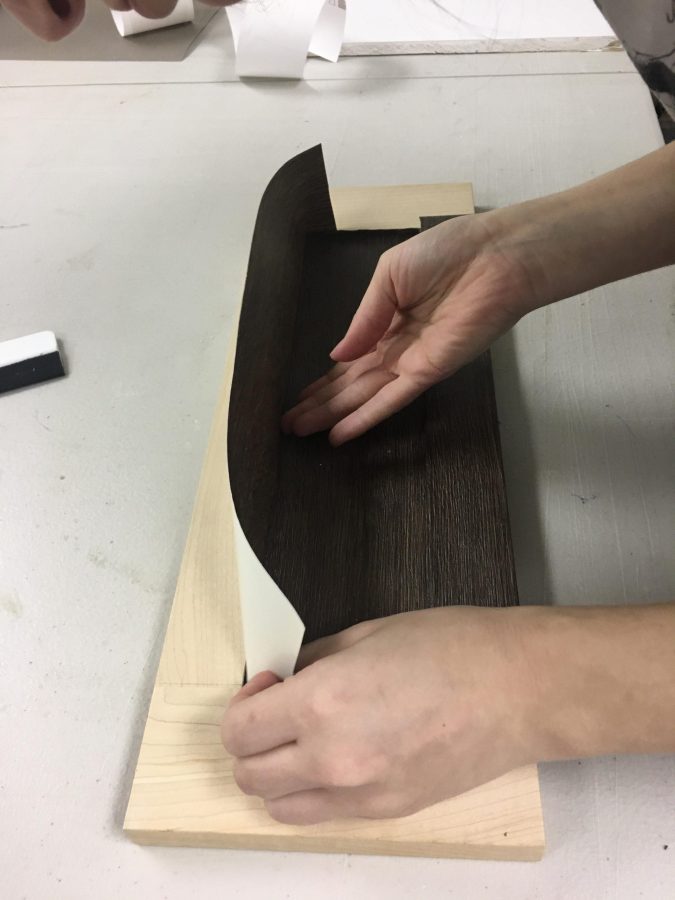
PEEL&STICK
In this project, I had to cover the door with five pieces of film, so the direction of fibers and seams on the door look natural. The fact that the film is self-adhesive and does not need glue for the installation surprised me. You just peel and stick. Amazing, right?
However, it is not as easy as it seems. It is recommended to start the install from one edge and slowly pull off the back liner, simultaneously pulling the film to stick it properly. So I did as recommended. For the small piece of film, the installation was relatively easy.
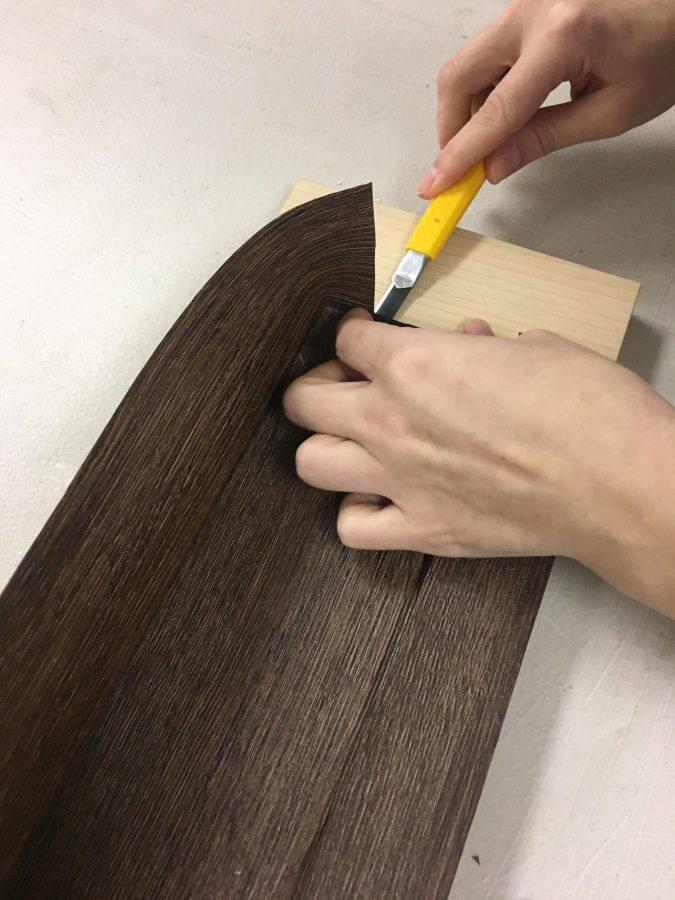
After the film stuck, I cut the excess and formed corners with a utility knife.
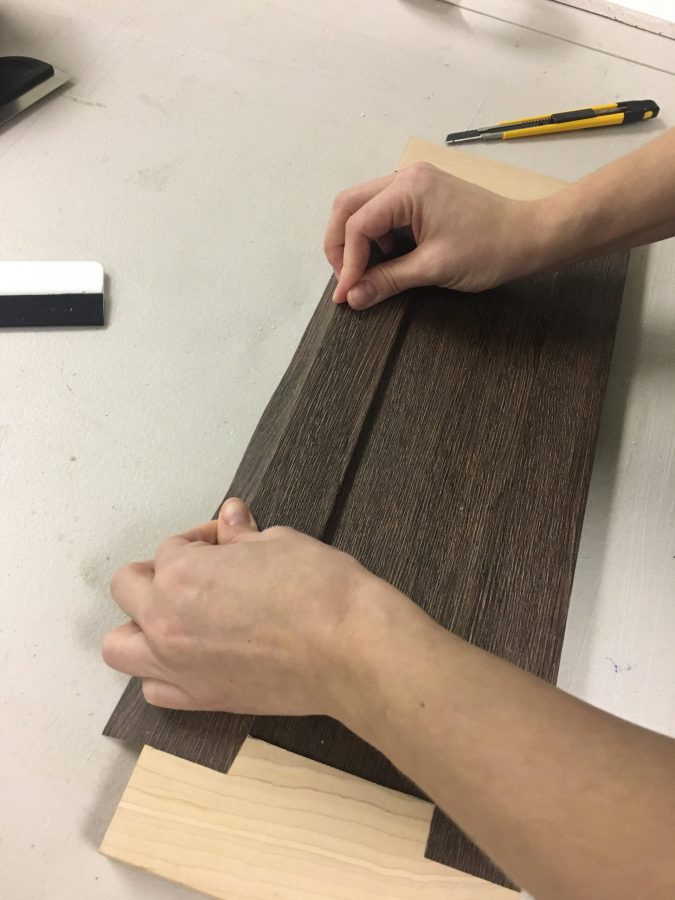
Then I continued to cover the rest of the cabinets’ parts. It is important to leave a small allowance on the edges of the film piece to cover seams. Only make sure it is not too big, otherwise, overlap will be noticeable.
The tricky part starts when the turn comes to the last two elements of the door, which are smaller, horizontal ones.
Firstly, you do the same – cover with an allowance for the seam.
Secondly, cut the corners of the film piece and wrap it around the inside edge, making sure the film sticks nicely.
Then, cut the excess film that overlaps previously installed one. This way you’ll have neat seams.
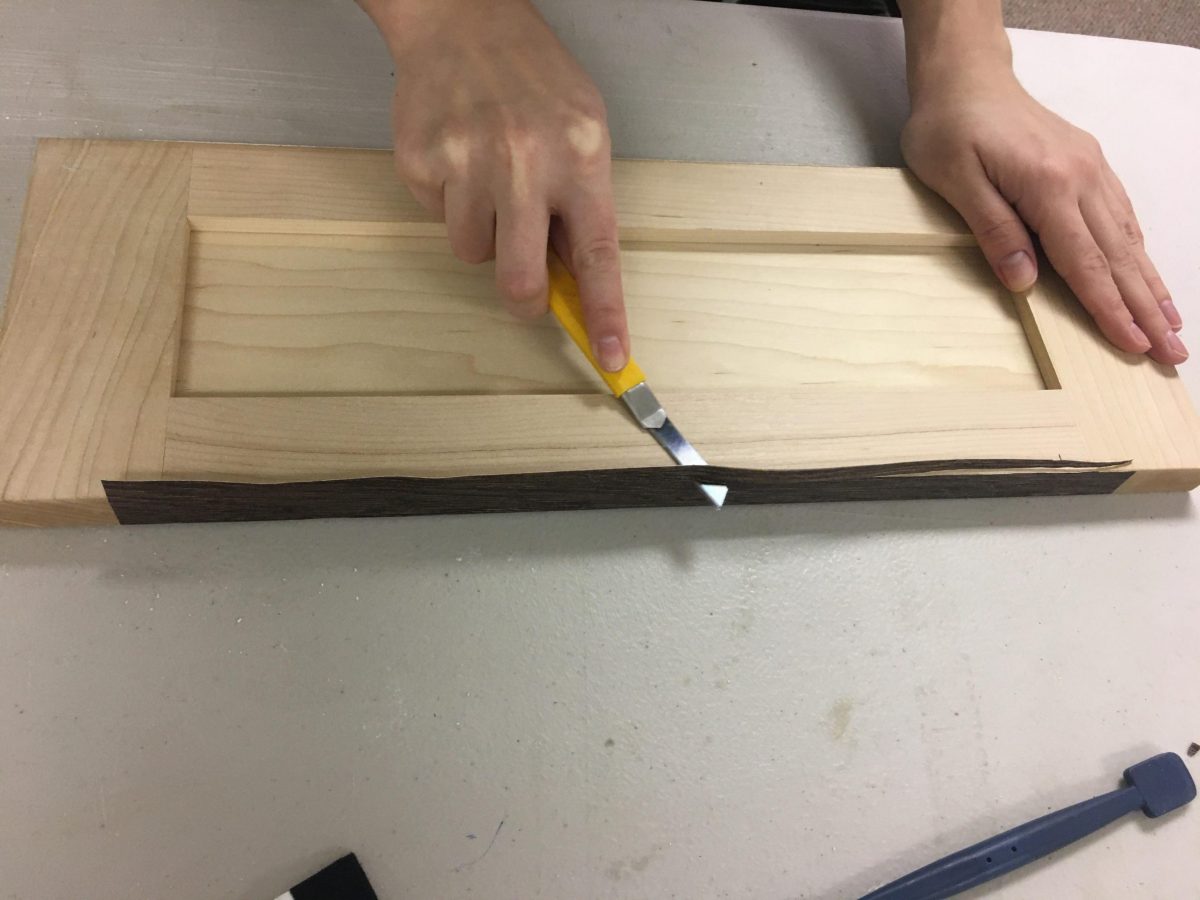
SECURE
After you’ve cut the excess film, it is time to secure the edges. There are two ways to do that.
The first one is to pull the film while heating it and cover the edges with it. Thus, there are some pitfalls. On one hand, you shouldn’t overheat the film because too much heat can damage it, on the other hand, you should heat it enough for it to stretch.
The second one is to make a small cut and fold the edges neatly. With Alan’s assistance, I’ve made a double cut for the corners of the door. That seemed like work for a surgeon to me.
Next, get rid of the excess film in both layers. Now you’re ready for the next step.
ADHERE
When there is a bigger area to cover, this step is a must. The film should be adhered using a fan-shaped sweeping motion of a squeegee at a 45-degree angle, from top to bottom.
The essential part is to get rid of bubbles when those appear. On the bright side, the manufacturer states the appearance of bubbles is minimized by the unique air channels in the film structure.
HEAT
After you’re done, heat the entire covered surface lightly. Especially, pay attention to the edges.
CHECK
It is also recommended to get back to the covered surface in a few days and check whether everything is okay. If some bubbles appear, you can get rid of them at this point.
So this is my finished cabinet door. I like it a lot, do you?
Overall, this was a great experience filled with exciting emotions. The installation seemed relatively easy for me. Although you should take into account that the surface I covered is for the beginner’s level. Still, I would definitely hire a professional like Alan if I ever need to renovate with the architectural film. There are lots of tips and tricks, as well as techniques in the film installation. Believe me, you want it to be done professionally.


